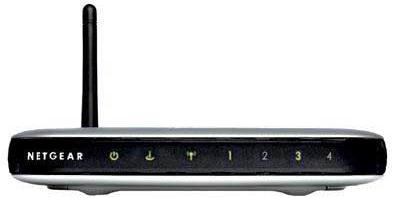
Resurrecting
a bricked Netgear WGT624 V1 / V2 router without using JTAG
Disclaimer
I take no responsibility in the following procedure. Moderate
experience in operating a computer is required to successfully
ressurect the Netgear WGT624. USE THE INSTRUCTIONS BELOW AT
YOUR
OWN RISK
Introduction
Netgear
released a firmware upgrade (v4.2.10) in June 2005 for the
WGT624
router which left a lot of people with nothing more than a brick once
the upgrade had been applied. People that had tried to apply
the
firmware to the WGT624 and have it fail whilst under warranty where
able to return the router to Netgear to be replaced with a new
unit. For people in this situation with expired warranties,
there
was little that could be done except to watch the flashing green and
amber power light... UNTIL NOW! This guide details
the
process of bringing your Netgear WGT624 router back to life without
having to use the more complicated JTAG interface..
Step
1.
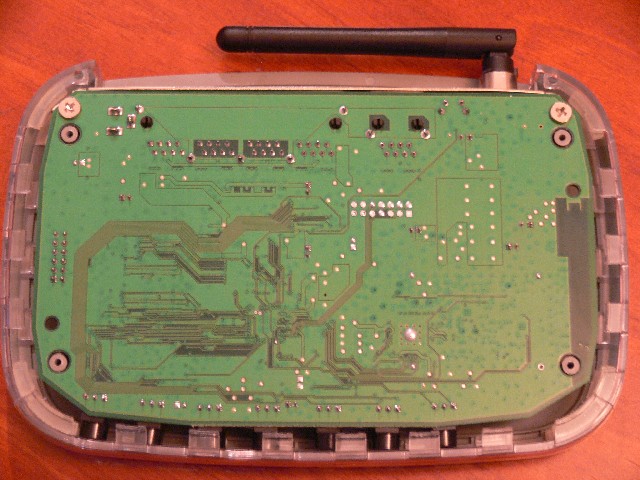
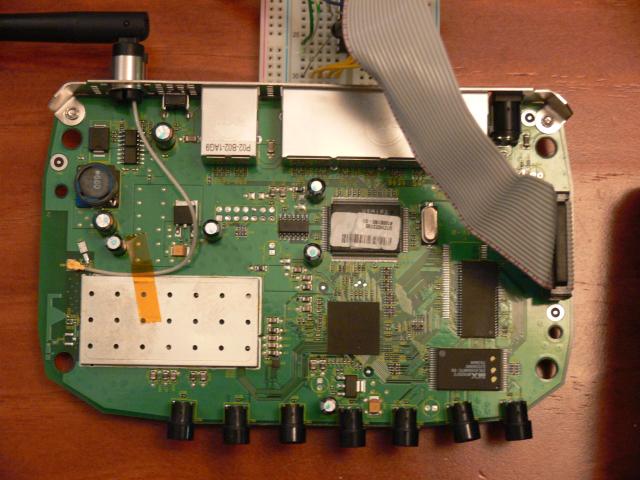
Disassemble
your WGT624 by removing the 4 screws from the bottom of the
unit.
(My particular WGT624 had philips head screws, but I have seen other
WGT624's that have had a certain type of torx screw.) With
the
screws removed, the plastic case should simply come apart, revelaing
the circuit board.
Step
2.
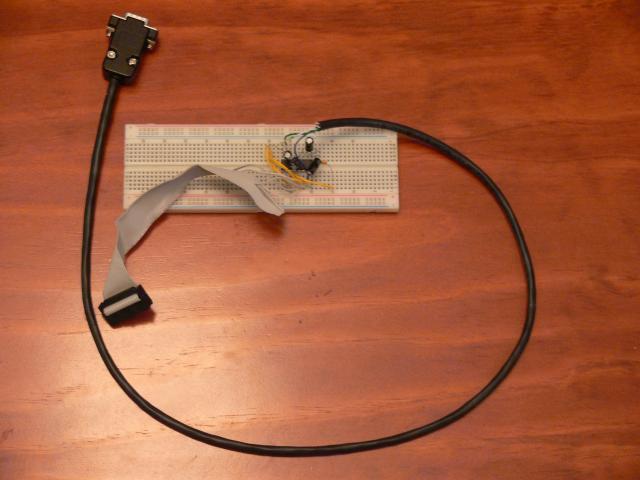
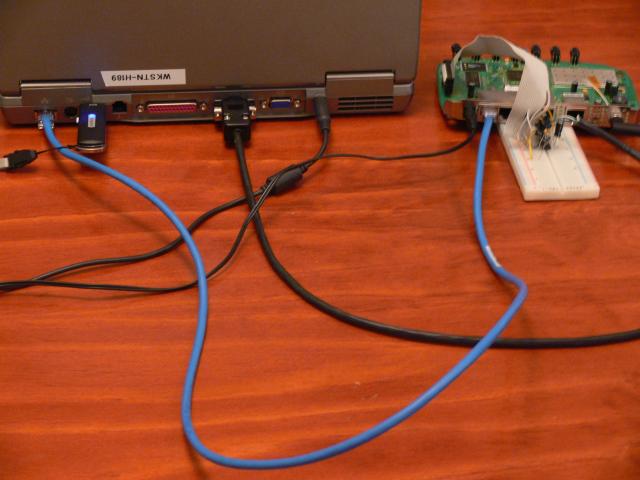
Build serial console interface. Click here for circuit diagram.
Step
3.
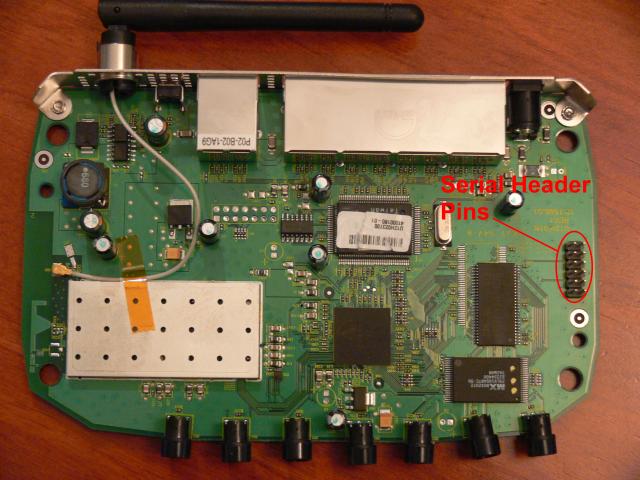
With
the circuit board revealed, you now need to identify the serial header
pins. The serial header pins are what the serial interface
will
connect to allowing us access to the WGT624 through a terminal
application.
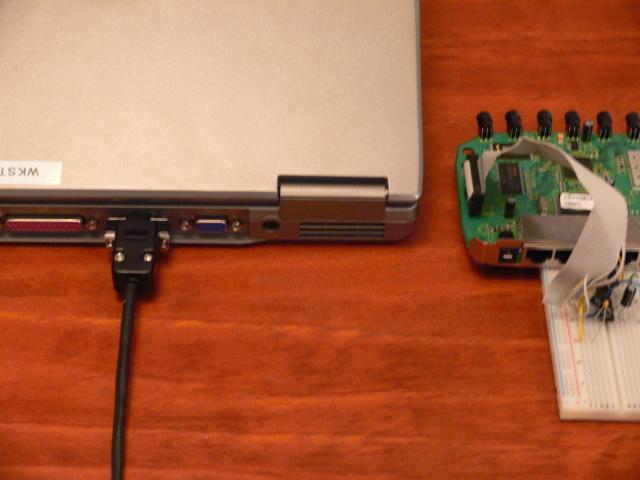
Connect the IDC connector from the serial console
interface to the serial header pins on the WGT624 circuit board and
then connect the DB9 connector to your computer.
Step
4.
The
TRENDnet firmware needs to converted from its .img format to the .elf
format so that the file is bootable over TFTP. I
used http://www.cygwin.com and
the following Linux command to strip the superfluous header information
:-
dd if=510APB_1121US.img
of=510APB_1121US.elf skip=52 bs=1 To save you time, here is the file already converted 510APB_1121US.elf .
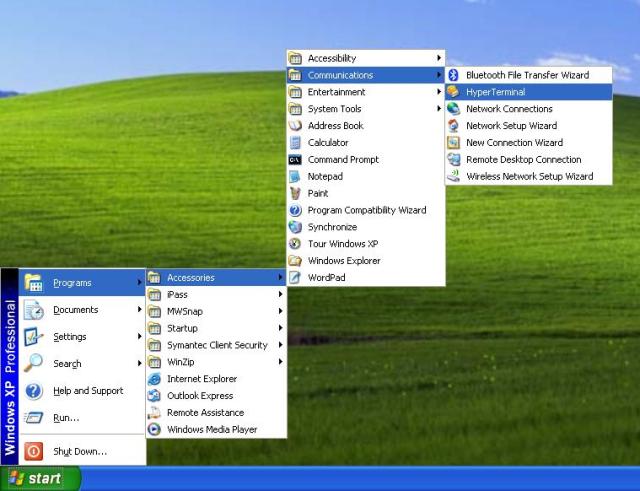
Step 5.
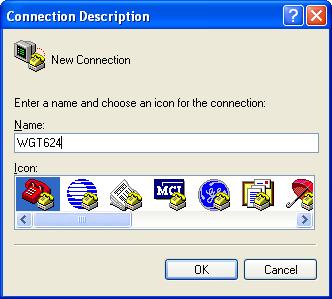
Launch your terminal application. I am using HyperTerminal
which is included with MS Windows.
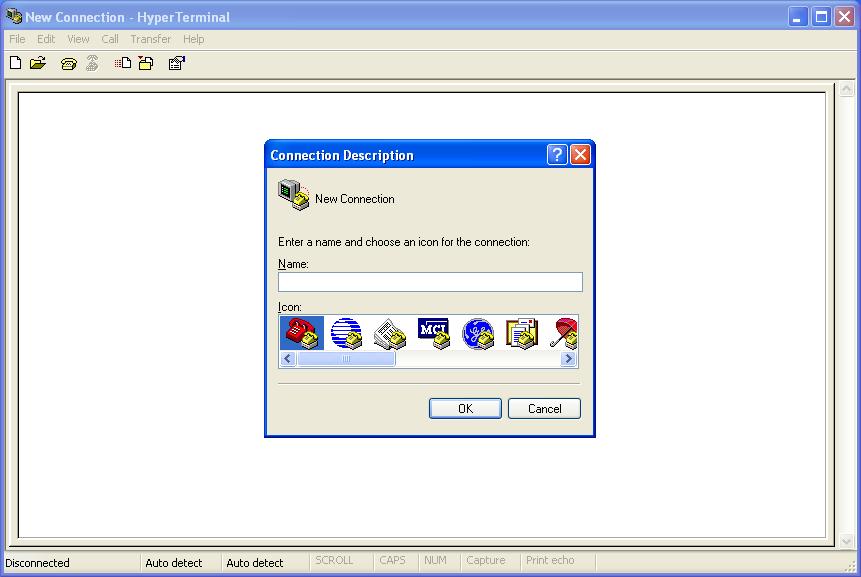
HyperTerminal begins asking for a name for the new connection.
Give your new connection a name and click OK.
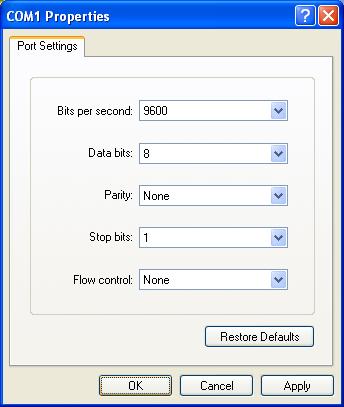
Select the COM port of your serial port on your computer and click OK.
Configure your terminal applicaton with the following settings :- 9600,
8, None, 1 , None.
Step
6.
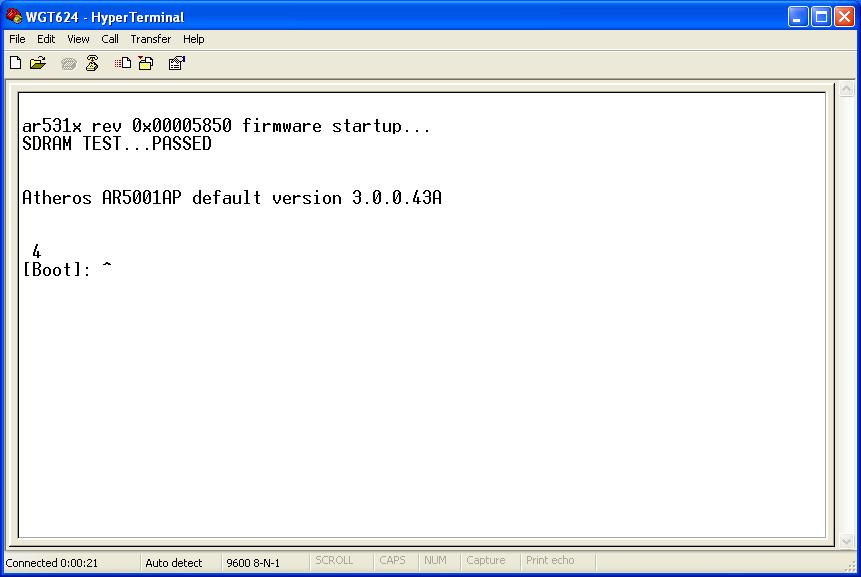
Plug the power adaptor into the WGT624 and continually press the "Esc"
key during the boot process to interupt it whilst watching the
terminal window. You should see the following.
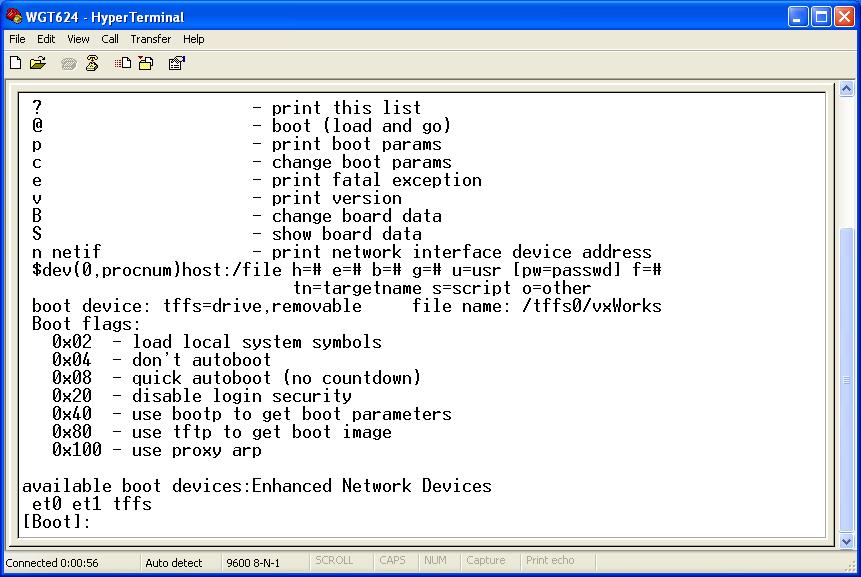
You should now have a boot prompt. Typing ? followed by enter
will give you a list of commands.
Step
7.
Before changes are made to the boot process, you need to configure the
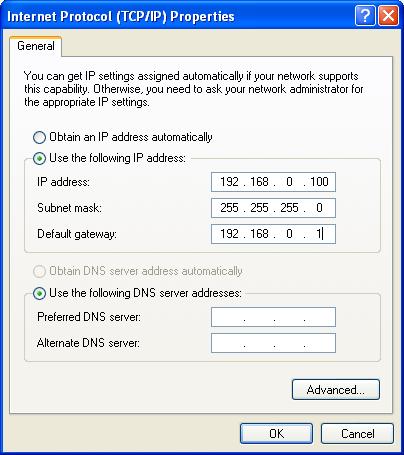
networking side of things for the TFTP application to work.
Connect the Cat 5 ethernet cable between your computer to any of the
lan ports of the WGT624.
Set the IP address on your computer to 192.168.1.100.
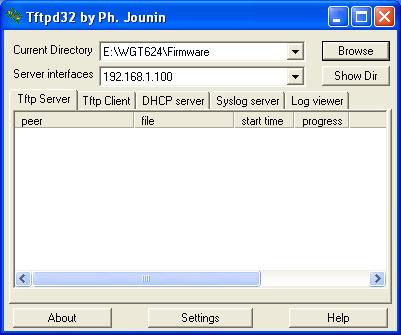
Now launch your TFTP application and set the directory to where the
converted TRENDnet firmware resides. NB. You may need to
disable the
firewall on your computer to allow the TFTP application to work
properly.
Step
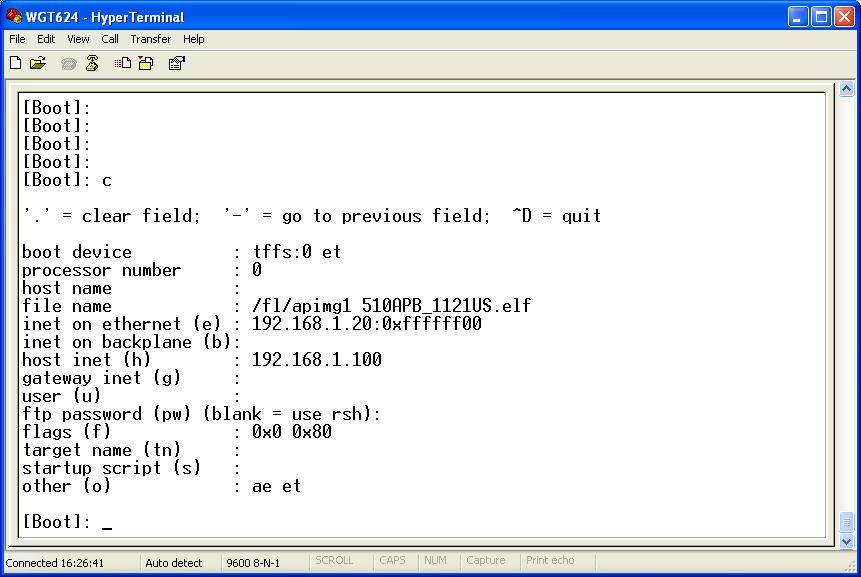
8.
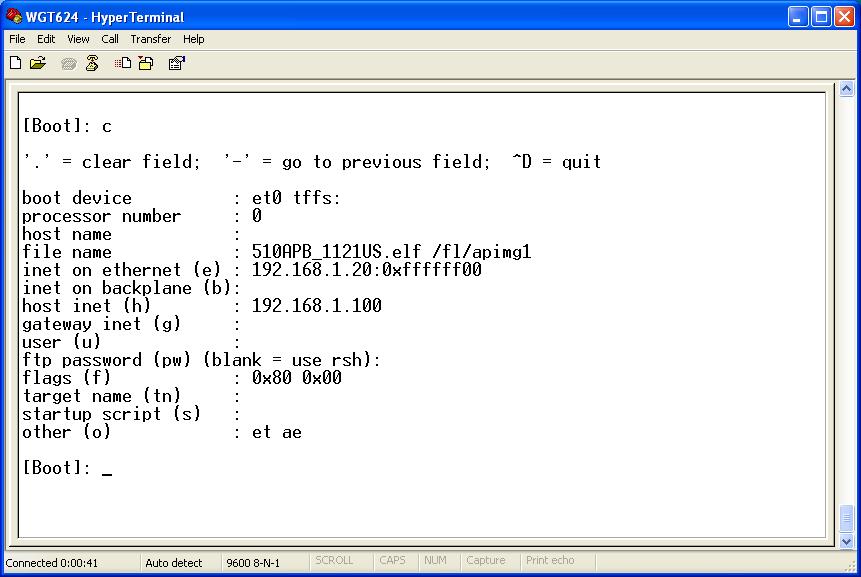
Back to the terminal application, press c followed by enter to allow
the boot parameters to be changed to the following :-
The WGT624 has now been configured to boot the ELF image file via
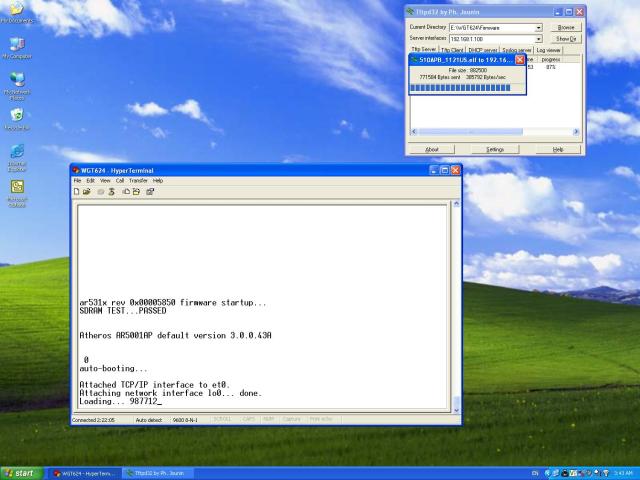
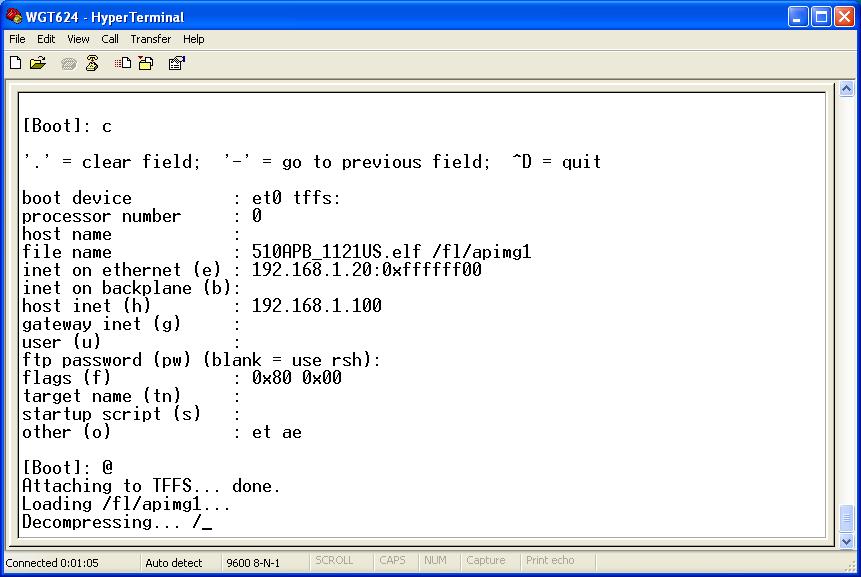
TFTP. We now need to reboot the WGT624 by typing @ followed
by enter. The WGT624 should now reboot and load the
510APB_1121US.elf file from our TFTP application.
Once the ELF image file has been loaded via TFTP, note the IP address
that is displated in the terminal window.
Step
9.
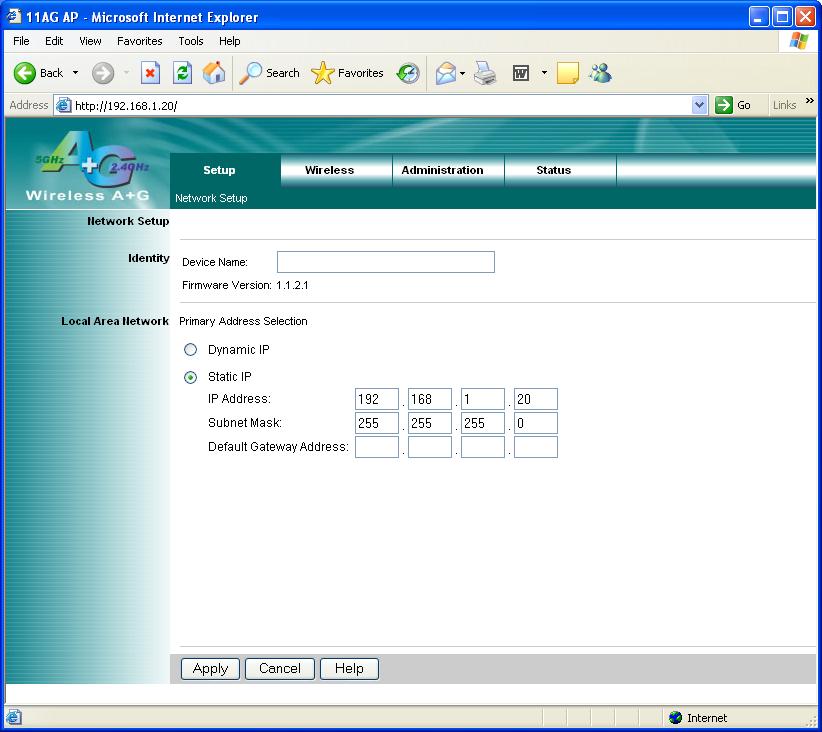
Launch your web browser and enter the IP Address that was displayed in
the terminal window as the URL. An authentication window
should open asking for a username and password. Leave the
username field blank and enter "admin" as the password, excluding the
quotation marks and click on OK. You should now be logged
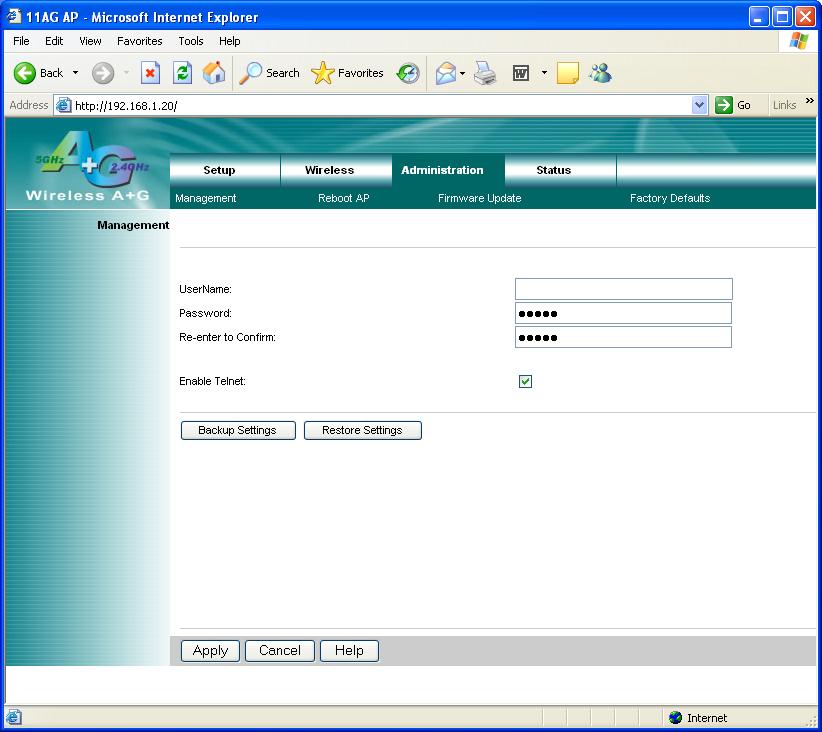
into the TRENDnet GUI as shown below.
Click on the Administration link.
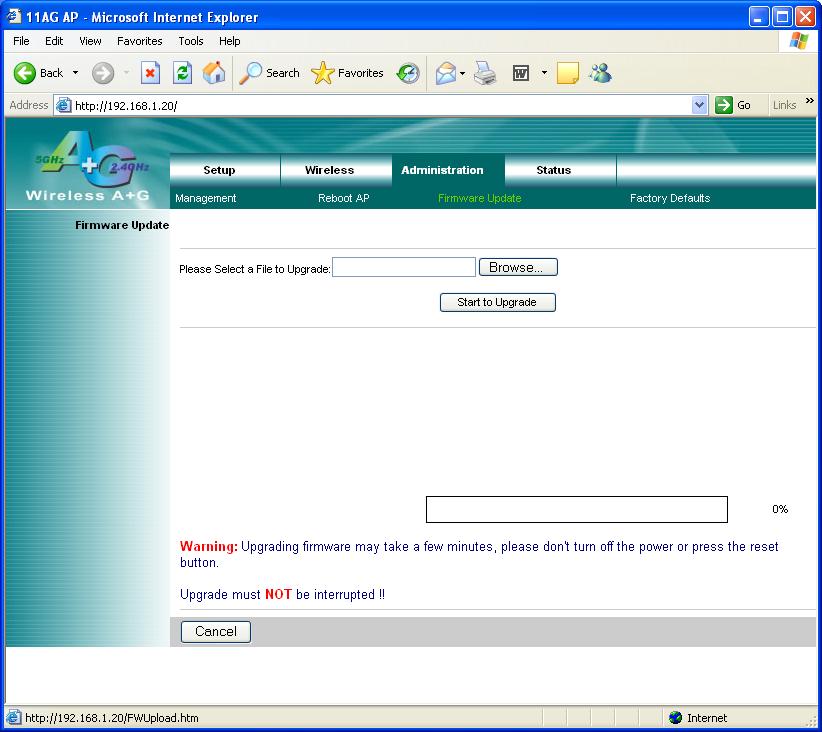
Click on the Firmware Update link.
Click on the Browse button and locate the Netgear firmware file and
click open. NB. The Netgear firmware file needs to have its
file extenstion renamed from .chk to .img. The TRENDnet
firmware update system will not accept files with other file extensions.
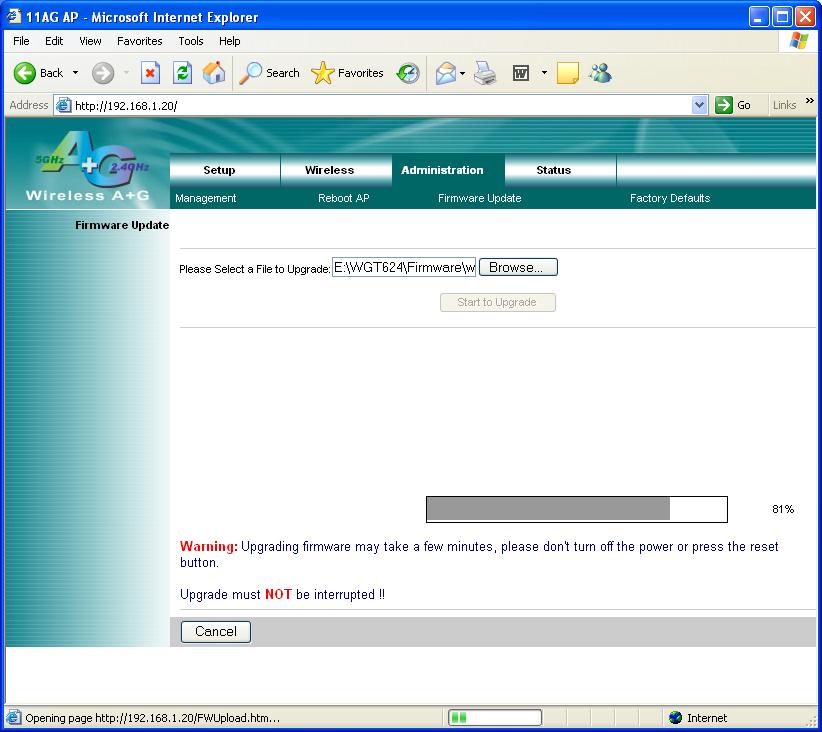
Now click on the "Start to Upgrade" button and monitor the progress bar.
Once the Netgear firmware has been uploaded to the flash memory of the
WGT624, you should then see the following screen.
Step
10.
If everything has gone smoothly, after about 30 seconds or so the
WGT624 will automatically reboot and return to the TRENDnet GUI.
You now need to change the boot parameters so that the WGT624 boots
from it's flash memory using the newly flashed Netgear firmware instead
of botting from TFTP again.
Reboot the WGT624 by unplugging and pluging the power adaptor into the
WGT624 whilst continually pressing the "Esc"
key during the boot process to interupt it whilst watching the
terminal
window. Once at the boot prompt, again type c followed by
enter and input the following boot parameters.
Type @ followed by enter to reboot the WGT624. The WGT624
should now reboot, this time booting from it's flash memory using the
newly flashed Netgear firmware.
The WGT624 uses the default IP Address of 192.168.0.1 so you will need
to change the subnet of the IP Address on your computer from
192.168.1.100 to 192.168.0.100.
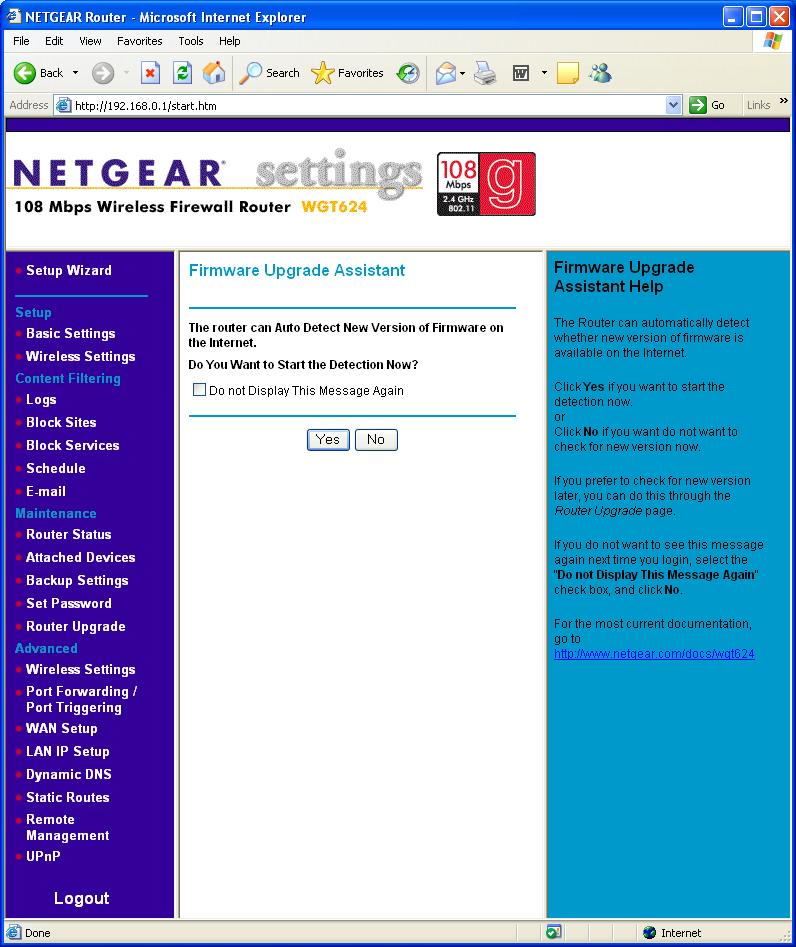
In your web browser, enter http://192.168.0.1 . An
authentication box should appear. Enter "admin" in the
username field and "password" as the password (minus the quoatation
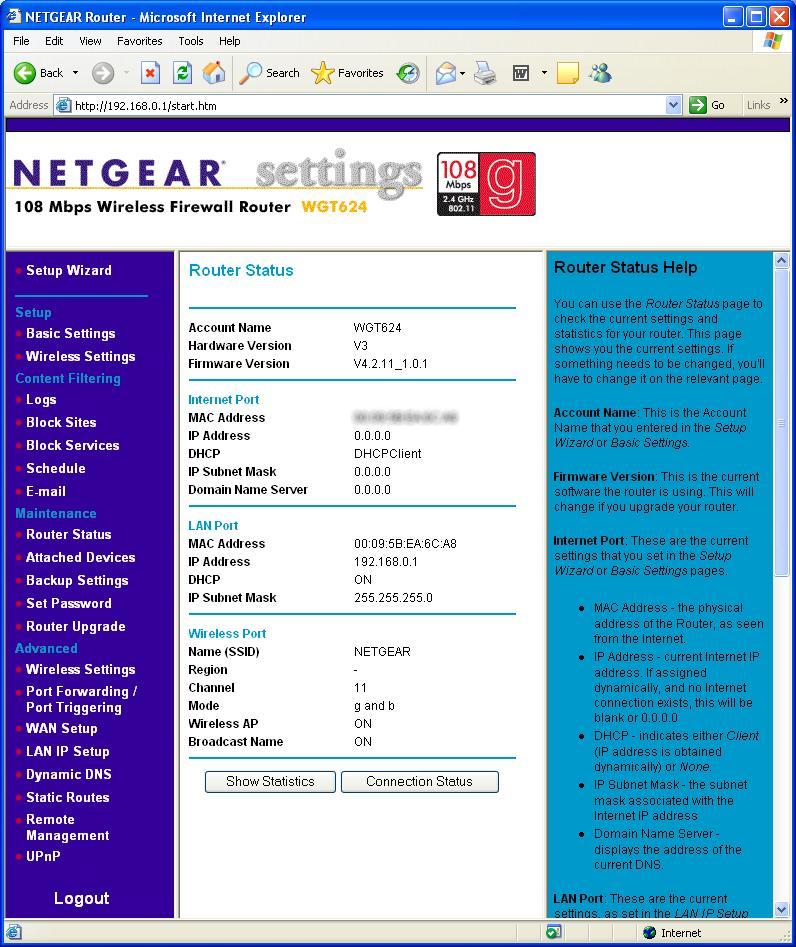
marks). You should now see the original Netgear WGT624 GUI.
Step
11.
Congratulations, you have now revived your WGT624. Place the
circuit board back in the plastic case and refit the screws.
If you found this guide helpful or interesting, please consider making
a donation to help cover my hosting costs by clicking on the PayPal
button below.